Showing posts with label Sizzix. Show all posts

Monday, 11 May 2015

Mixed-media spoons - May's Guest Designer

Hello! We hope that you enjoyed our videos on Saturday, because today we have another treat for you - the guest blog post from our challenge winner - Cathryn Wood from Strangely Creative blog. Talented, positive and a lovely person who creates beautiful mixed-media works and likes to share the process on her blog. Let's give her a warm welcome :) Here's what Cathryn prepared for us:


I wanted to do something totally different and fun - my favourite techniques are probably collage and image transfer,
also I love anything Altered and mixed media
So I decided I wanted to work with these:


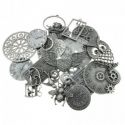
And also use my purchases from Artist Trading Post:


To create these:

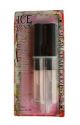
I used the Multi Medium to adhere everything!  What a FANTASTIC product this is - blimey it does EVERYTHING it says on the label!
For  Butterfly girl I flattened the fork and then found a really good image which was punched out using a circle punch and glued on, the tines (fork prongs) were heated with a heat gun and then bent using round pliers. I also adhered some Suze Weinberg Beadz on the handle along with the metal Route 52 ephemera (which appear on all the cutlery)
For spoons 1 and 2 the images were glued on and once dry I poured in some CLEAR RESIN (try Ice Resin) to the bowls,its hard to see them in the picture - but they have a lovely aged appearance and really do look fab.
The fish knife and spoon 3 are image transfer - (the image must be copied using one of those big office photocopiers) the Multi Medium is painted direct onto the cutlery surface and the image is pressed face down, and allowed to dry overnight. Then dampen it with water and slowly rub away the paper and the image will adhere to the Multi Medium.   The thing is - dont over rub it, or you will rub away the image.  Once its done seal it with a coat of the Multi Medium to protect it.

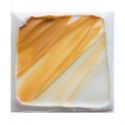
Spoon 3 was flattened, then I did the image transfer and once it had been sealed with the Multi Medium I gave it a coat of Crackle Accents.  This felt very "Game of Thrones" and I thought that the Route 52 ephemera really fitted this particular spoon.
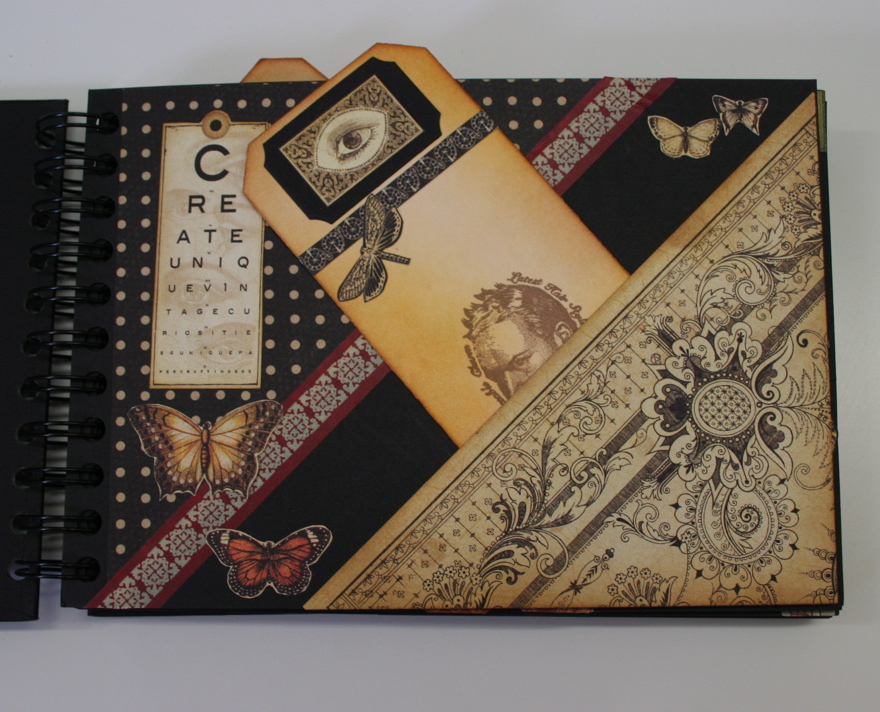
Ok - you can give them as they are to your friends as a little gift,  or you can do this:


Take a blank box canvas - and some texture paste through a stencil and then ink it up - give it some welly...


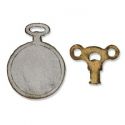
Then attach the cutlery with the Multi Medium as a glue - add some further ephemera (look at the brilliant Tim Holtz pocket watch die!) and some words and you have a really different and quirky picture!
"Which would you imagine" - go on have a go!
Love it! 

Products from Artist Trading Post that Cathryn used:


Thank you Cathryn for your beautiful project! It was a pleasure to work with you. :)

For all of you who would want to be our guest designers we have a challenge. All you have to do is to enter it. Here you'll find more details.

Friday, 8 November 2013

Victorian Carolers

Hello everybody, I am finally back online. For some reason my computer was very full, thankfully Jamie understands it all and has sorted it out for me.

I have been having a great time doing the Creative Chemistry 102 with Tom Holtz, I have not quite finished it all and some technique's need a little more practice.

I am also doing the Lifebook 2013, and when I can take some better photo's I will give you a glimpse of my pages it's going to be a awesome big book. I am already looking forward to next year as the very talented Dyan Reaveley and Anna Dabrowska (Finnabair) are going to be just two of the amazing artists that are contributing. If you need weekly inspiration then it is well worth doing.

Finnibair is coming to Artist Trading Post on 31st November and 1st December there are a few places left on the Sunday afternoon so if fancy doing a stunning project called Everyday Treasures mixed media shadowbox check out the website.

We are very pleased as Sue Carrington is doing a Workshop for us on Saturday 16th November. Sue is going to show us how to create an Altered Keepsake Box. You can find Sue on Paper Artsy's blog where she was a guest designer or have a look at the stunning project's she does on her blog here.

 Here are some pictures of cards I have made using a New Tim Holtz Die called the Victorian Carolers. The two little figures are so cute I want to use them on everything.

The figures have been cut out of card and painted black and then sanded for that distressed look, it doesn't show up on the photo.


Here I have used an old piece of music sheet, tinted the paper and frame with Vintage Photo Distress ink, and also blended through a stencil.


After stamping the snowflakes with Evergreen bough Distress ink, I then sprinkled sticky embossing powder over the card, heated and then covered with Dry Distress Stickles, for the figures I applied Glossy accents and Dry Distress Stickles and then let dry naturally.


Here I have embossed a piece of pearlescent card using the Sizzix Christmas border and background folder and swiped evergreen bough over the raised arear with blending foam.

The silver Tinsel Twine has been coloured with Alcohol Ink and then heated with a heat tool to give it a distressed look.


Thanks for reading,  Sharon x


Tuesday, 11 June 2013

Fathers Day

Just a reminder it's Fathers Day this weekend, I have made a few card's using the new Pocket Watch Frame by Tim Holtz from Sizzix.

But it doesn't just have to be used for a male theme, change the colour and it could be used to hold family photo's, wedding's or birth and because it is a Bigz die it will cut out quite thick card or Grunge Board.

I also made a pocket watch and decorated the inside with Olde Curiosity Shoppe papers, the flying pig and star fish have been cut out and raised on little foam pads. I fitted a acetate cover as the glass part. When it's not being photographed it stands nicely on a mini easel.

The bezel of the watch has been embossed with a Tim Holtz Texture Fade and coloured with Treasure Gold highlighting the different levels.


This card has been stamped using the Crafty Individuals Steampunk Stamp CI 305. The pocket watch frame is embossed with the Diamond Plate and Riveted Metal Folder Sizzix folder. 


The Dial is stamped using Paper Artsy Hot Pick 1107 and coloured with Tea Dye Distress ink. The back ground is stamped using the same Crafty Individual stamp but I used Bundled sage for a change and I was pleased with the colour. 


With a bit of luck I might be able to produce some better photo's after attending one of our workshop's where Jamie is going to be explaining how to use your camera to get the best out of it. So if you have a nice camera and fancy a fun packed weekend come and join us. After we have taken some photo's we will be turning them into a canvas, so check out the workshops here.


Love to see you

Sharon


Monday, 13 May 2013

My Steampunk Book

Another wet weekend for many, hope you had a good time anyway I made the most of it by playing in my craft room at the very top of the house.

I have been working on my Lifebook 2013 pages and because of the house move and opening the shop I am so far behind in fact I have just finished a page for February.

We have just had two wonderful workshops, here are some pictures of the book we made using Graphic 45 paper and a Seawhite Journaling book.

The cover we made from scratch then painted and aged with cogs and clocks from Tim Holtz Sizzix dies and a Optical lens from Jamie's collection.


We made tags and pockets for journaling or photo's. You can just see a fine gentleman stamp from Paper Artsy HP1108.


Hers is a card slipped behind a band.


The card open with another area left for photo's. It is edged with Wild honey and Vintage Photo Distress Inks these colours compliment the papers beautifully.


The pockets are large tags folded over with two different size of tags inside. All cut from sizzix die's.


These are stamped with sentiments from Stampers Anonymous CMS110 Stuff to say.


The little tag on the tag has been embossed with a Sizzix Texture Fade Diamond Plate, there are two in the pack the other is Riveted metal which we also used on the front cover.


The fine script stamp is on CMS087 Shabby French another great stamp From the Tim Holtz collection, it is a older stamp but so useful. Because it is a background it was stamped using Wild Honey Distress Ink.


Another of the stamps from CMS110 Stuff to say, this time with Archival Ink. The quote is pretty apt I thought.


A little book and edged with the Sizzix Lace Die.


And inside a picture of my lovely Mum. 


A page with two pockets and the stamps are from CMS087 Shabby French and the diamond pattern from CMS063 Mini Muse.


The edge of the page was cut using the "Ornate" on the edge die.


Another little book cut from the Matchbook Die.


And because I don't like to waste anything all the little bits have been used to fill this book.


I really enjoyed this workshop and if anybody is interested in taking it, let me know and I will run it again. There are so many pages in the book I could even do some new pages.

Have a good crafting week and as it's not fit to go out in the garden I am going to stay in the safety of my crafting room with my trustee crafting companions Jack and Bru. (who don't pinch my scissors).

Bye for now Sharon

There is a workshop on Saturday The Altered Photo Canvas. You can bring along your own photo on a memory stick if you would like to do something different. if you are not sure check with Jamie (the technical department).

Thursday, 14 February 2013

Happy Valentines Day

Jamie and I would like to wish all you lovely people a Very Happy Valentines Day. (just in case the other half forgot).

So I made you all a little card, you have just got to share it between you.


close up


I wanted to see what effect you would get when you blend Paper Artsy Paints and Distress Stains together.


So I applied a small amount of Sherbet and Rose Chalk paint along with Brushed Pewter Distress stain onto the craft sheet, spritzed with a drop of water and then swooshed my card through it. 


And that's the effect I got, I blended in Broken China Distress Stain to a small area so that it wasn't too pink.

The stamp in the background is 'Love Is' by Indigo Blue, and the sweet Crowned Bunnies are designed by Alice Palace for Craft Individuals.

I cut out the hearts from the sizzix Mini Hearts set and run it through the Diamond plate Embossing folder and coloured with Victorian Velvet Distress Ink and edged it all with Aged Mahogany.

This time last year Jamie and I moved into our new house in Mid wales, we didn't have the furniture that was arriving the next day, but we were nice and cosy in our sleeping bags.

Hope you have a great day and love to see you again soon

Sharon x 

Tuesday, 15 January 2013

True Intentions

I have decided I am going to try and do my own tag each month. The theme for my Tag for January is Found Stuff. As much as I love Tim's tags I am trying not to be influenced in my design.

Most of the embellishments I found on my craft desk after doing a mixed media canvas, you know what it's like you have an idea, make something and then it doesn't fit in with what you are doing, so it sit's there but you don't want to throw it away.

The quote on Tim Holtz stamp "Words for Thought" CMS132 sums it up perfectly and I also like his new burlap panels, but I am so impatient I want them now. Well I have had to settle for a scrap of hessian and some organic muslin, which look really good sprayed with Dylusion Ink Sprays.

A large NO 10 tag went through my Big Shot Machine in a Sizzix honeycomb folder then coloured with distress inks.

The smaller tag was embossed with white powder so it resist's  the distress ink. The stamp used is CMS087 "Shabby French".

Theres small cogs, which have been given some texture and others cut out of metal and coloured with paint and alcohol inks. Half of a weathered clock cut out is placed under the tag and behind the name plate. On top of that is a tattered flower and leaf.


Well I think that's enough about my tag, hows the weather with you. It snowed on Sunday but was gone by Monday Morning but it's looking a bit black at the moment, so more could be on it's way.

You may have read that I have signed up for the Lifebook 2013 course and I am really enjoying it. It's taking me out of my comfort zone, but I am also making good use of my stash. So if you need some inspiration and would like to learn new technique's go over to Willowing.org. Here's a peek at one of the pages of the book I have done.


The words inside the ballons are be grateful, be happy, be honest, never give up and make good memories, these are my True Intentions for 2013.

Hope you enjoy my pages see you soon,

Sharon x

Tuesday, 4 December 2012

Cardinal's had a hair cut?

Well it's been a busy weekend not that I'm complaining. We popped back to Ashbourne to see family and friends. We soon run out of time with so many things to do with Christmas and Birthdays coming up.

When we got to the bed and breakfast on Saturday night, we were welcomed with a big roaring fire in the bedroom, I should have packed the Bailey's it would have been the perfect setting for sitting and sipping.

So with Christmas in mind I have made a card and tag using the Sizzix Bigz Die Christmas Cardinal. (You could use the Mini Cardinal as well)

But I thought he needed a new hair-do (and a beak trim)

This is how he started out


So in great british tradition the Robin is born....

The background is Sizzix texture fades from the Christmas border and background set, painted with diluted Ranger Gold Dabber as is the Crunchy Wax Kraft Paper which is underneath.

Merry Christmas is stamped onto a Tattered Banner and distressed with Walnut stain.

I have also added ribbon cut from manilla cardstock with the Vintage Lace strip die.

The silver tinsel twine I have tinted with Cranberry and Terra Cotta Alcohol Ink.


The tag below was coloured with Ripe Persimmon Distress Stain, embossed and the raised areas highlighted then covered with Rock Candy Distress Crackle Paint and edged with Walnut Distress ink which soaks into the cracks.

To finish it off top and bottom again I have used Vintage Lace from the Sizzix Strip Die, coloured with gold dabber and distressed with walnut stain.

I painted the robins red breast using barn door reinker (which is like distress stain on steroids) and the rest is a combination of inks and markers and picket fence distress stain.


Oh and I also cut out another Cardinal sorry robin in Indigo Blu's Black cardstock and offset it slightly just to make it pop out more.

Hope you like my little altered bird, thanks for looking in 

Bye for now

Sharon

Tuesday, 20 November 2012

Jack in a Box


Hello

It's Tuesday again and the day I always think about blogging. Maybe because I have had a good crafting weekend, partly due to bad weather and the Grand Prix, if you know what I mean.

I have decorated a little house and I promise you this is the last christmas decoration I am going to make. Well this week anyway.


It is a wooden house that we sell at £3.49 a bargain. It needed a coat of paint so as usual I grabbed my favourite paints Paper Artsy Acrylic's and used Baltic Blue with a little dry brushing around the edges.

While that was drying I cut out the Pennant from the sizzix on the edge die aptly named Pennants twice, once with plain lining material and the second with a piece of card.

The material I sprayed with a Dylusions Spray London blue and left that to dry before stamping with the snowflakes from Tim Holtz CMS066 Mini holidays.
When all dried I glued the material to the card and then stuck the Route 52 Snowflakes to the back of the card.

The little Route 52 Bucket is painted with Pearl Dabber, the little boy who is posting his letter to santa was left over from the Shadow Box Drawer's. All the paper is from Graphic 45.

I painted the corked Vials and then stamped onto them when dried and decorated with Idea-ology Tinsel Twine.
The "Believe" Philosophy tag I wiped Snowcap Dabber over and removed to show the word better.

I made a little christmas card and distressed the edges and applied a little stamp from the Graphic 45 papers. So that's 2 projects and only 3 pieces of cardstock, I like to get good value from my paper.

The little bows that are dotted around are cut from the Sizzix Movers and shapers Mini Wreath and bow, which is at the apex of the house, plus the 25 from the reindeer and 25 set which has been embossed with Ranger's Rich Red (before embossing it looks a really bright red but changed to a lovely deep red).

Christmas Carols was stamped onto shrink plastic, I find the easiest way to shrink it without losing it, is place the piece in a box and let it go from corner to corner.

Hidden in the bottom corner is a ticket from a strip die and stamped with Merry Christmas from Tim Holtz CMS100 Odds and Ends there's something for every occasion on that stamp set.

Lastly Jamie wanted snow on the roof, so I splodge Mod Podge around the edges then sprinkled with Rock Candy Dry Glitter, I thought it looked quite nice but Jamie pointed out That it was frost and not snow.

Theres also the really cute wooden reindeers at the bottom and I think that's about everything.


Jamie's just made a lovely mug of coffee and then look what we found in the Photo Light Cube.

Oh Jack!!