Hello everyone, Yvonne here, it's my week to share an ATP Exchange Post with you.
I love to use up bits and pieces that can be found on my desk, often lefts overs, but to my mind useful.
But first of all I want to share this product with you.
It's so easy to use ............ 'Silk Clay'.

It's smooth, flexible, lightweight, self hardening and feels like rubber when you use it.
There are a variety of colours, but I chose to go with white, then the colouring would be my choice.
One of the molds I used is shown in the photo Mod Podge Industrial
One of the molds I used is shown in the photo Mod Podge Industrial

As you can see it can be used in molds. Use small pieces of clay, be
sure you press it well down , then ease it gently away from the side
of the shape, (makes it easier to remove and doesn't need trimming].
Pressed into stamps, with cutters, or shaped by hand.
Pressed into stamps, with cutters, or shaped by hand.
When using the mold, I have found it easier to remove, if you lightly dust the mold with talc first.
You can remove it from the mold quite quickly and leave it to set on your desk.
I found for me that about 30 minutes was the ideal time before removing it from the mold.
You can remove it from the mold quite quickly and leave it to set on your desk.
I found for me that about 30 minutes was the ideal time before removing it from the mold.

A little goes a long way, I made all of these shapes, using only about a third of the pot.
At £1. 99 I call that a bargain buy.

It is easy to colour as well.
The colours I used here were to fit in with my project.
So what did I make?

A recycled base canvas 7 x 5 inches, painted with a few coats of White Gesso
to cover the original decoration.
Old book page scraps, buttons, Washi Tape, scrap of material, and a few metal bits and pieces.

More texture added using Grunge Paste and a Gothic stencil by Tim Holtz.
Then a few more coats of White Gesso

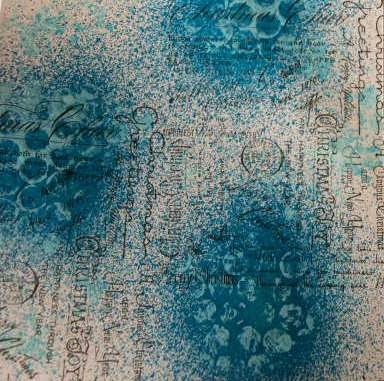
Random stamping using a very old script stamp.

Starting to lay on some colour using Prima Colour bloom, Summer Story and Dylusions White linen sprays.

This is the where I decided to stop and began adding some Treasure Gold White Fire, to highlight the assorted bits and pieces.

The focal image and quote are from the Dina Wakley Scribbly Women set.
Stamped onto tissue with Black Staz On. Tearing around the edges rather than using scissors gets a better finish when adding to the canvas and textures using matt Gel medium.

So here is my finished canvas,
I added some of my home made embellishments adding extra Treasure Gold highlights.
All the products I've used that available from Artist Trading Post are linked
so you can find them easily.
Online or in the bricks and mortar shop you will find a fantastic range of products for all your crafting needs.
Yvonne
x