Monday 11 November 2013

Dylusions Workshop at Artist Trading Post

Yesterday I was joined by seven lovely ladies, we all got inky and creative in true Dylusion,s style.

They were a bit reluctant to start messing up their new Dylusion's Journal, but they soon overcome the fear of getting the spray inks all over it. I think the books look loved and used when the pages start getting thicker from sprays, paints and stamping images.

Tables before the storm...


Carolyn, Claire and Jane busy Stamping.


Lisa trying to pick a stamp.


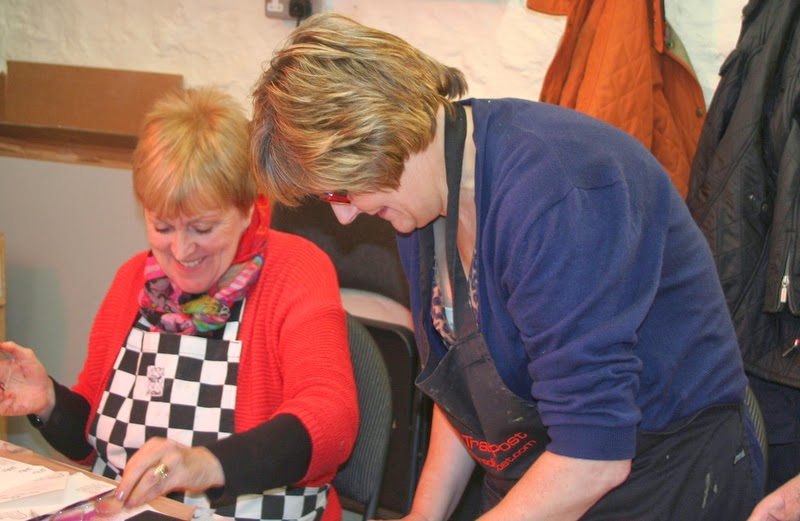
Maggie and Karen getting messy.


Sheila looking on, tables getting messier and it's early yet.


We started with tags to get in the swing of it. Here is Carolyn's super tag.


This is Claire's who is very new to stamping and spraying but I think we have converted her.
Looking at the tag you wouldn't know it.


 Here is Jane's, hope the spray comes off her hands?


I hope I have these in the right order, sorry ladies if I get them wrong but they are all wonderful.

Maggie's tags showing the ghosting technique.


Karen's tag I remember this one because she doesn't like her people floating, so she kindly stamped them a little platform.


Here's Lisa's displaying lovely spraying through a stencil.


Now we are in the Dylusion journal,


We have a mix of Jofy and Darcy stamps.


But instead of cutting the images out we used masking fluid. 


Not sure which process is preferred, but it is another option.


We then used Dylusions spray's to paint in the stamping.


The next pages were sprayed ready for finishing off at home.

Look at these vibrant colours.


Folded pages with pockets to hold your tags. Jamie and I attended a workshop with the lovely Dyan 
were we did this method in a old book.


Sorry if I missed your book Ladies because I only seem to have five pictures but they were all fantastic. Hope you enjoyed your day, I certainly did.

Here are a couple of my pages where I was inspired by Dyan Revealy. Thankyou for inspiring us all to create art and enjoy life.


Thank you for stopping by, hope you had a great weekend and enjoyed some crafting.

Sharon xxx


Friday 8 November 2013

Victorian Carolers

Hello everybody, I am finally back online. For some reason my computer was very full, thankfully Jamie understands it all and has sorted it out for me.

I have been having a great time doing the Creative Chemistry 102 with Tom Holtz, I have not quite finished it all and some technique's need a little more practice.

I am also doing the Lifebook 2013, and when I can take some better photo's I will give you a glimpse of my pages it's going to be a awesome big book. I am already looking forward to next year as the very talented Dyan Reaveley and Anna Dabrowska (Finnabair) are going to be just two of the amazing artists that are contributing. If you need weekly inspiration then it is well worth doing.

Finnibair is coming to Artist Trading Post on 31st November and 1st December there are a few places left on the Sunday afternoon so if fancy doing a stunning project called Everyday Treasures mixed media shadowbox check out the website.

We are very pleased as Sue Carrington is doing a Workshop for us on Saturday 16th November. Sue is going to show us how to create an Altered Keepsake Box. You can find Sue on Paper Artsy's blog where she was a guest designer or have a look at the stunning project's she does on her blog here.

 Here are some pictures of cards I have made using a New Tim Holtz Die called the Victorian Carolers. The two little figures are so cute I want to use them on everything.

The figures have been cut out of card and painted black and then sanded for that distressed look, it doesn't show up on the photo.


Here I have used an old piece of music sheet, tinted the paper and frame with Vintage Photo Distress ink, and also blended through a stencil.


After stamping the snowflakes with Evergreen bough Distress ink, I then sprinkled sticky embossing powder over the card, heated and then covered with Dry Distress Stickles, for the figures I applied Glossy accents and Dry Distress Stickles and then let dry naturally.


Here I have embossed a piece of pearlescent card using the Sizzix Christmas border and background folder and swiped evergreen bough over the raised arear with blending foam.

The silver Tinsel Twine has been coloured with Alcohol Ink and then heated with a heat tool to give it a distressed look.


Thanks for reading,  Sharon x


Wednesday 25 September 2013

Darcys New Stamps and more....

I am so excited we have received the new stamps from Paper Artsy which are designed by Darcy.


Here is a picture I made out of a scrap of board and a piece of cardboard, I was actually trying to organise my box of papers and I found a photo of Jamie's that he had printed onto Claudine Helmuth's sticky back canvas and I had the idea that it would go with the trailing hearts on EDY01
The lock is one from a packet of Route 52 mini fittings 2 and a steampunk key.

The background is covered by blending Paper Artsy Paints with cut and dry foam, I have tried to follow the colouring of the photograph as much as possible which is quite easy with the fantastic colour range there is.

The middle layer is stamped using P/A paints and on the top layer I have used Black Archival ink.
Onto the black mount board treasure gold has been blended through the Chicken Wire Reversed stencil by The Crafters Workshop.


I am working on the projects for the new workshops, you can see them all here.

We have just done  The Altered Secret Book, and the ladies really enjoyed it, using different techniques and new products to some and maybe even working out of their comfort zones.

This is my cover, 1st step Paper Artsy Grunge Paste through a stencil, dry it paint it black (in my case) then dry brush with various browns and red and a gentle rub with Treasure Gold on the edges.

The workshop was taken by 6 lovely ladies we had Jill, Ruth, Jill, Karen, Marilyn and Pam. The photo's I have taken do not show the true colours, I only had the phone the day before and haven't had much time to practice, that's my excuse and I'm sticking to it.


This is Jill's front cover and the inside page's are below, Jill brought the beautiful picture's of the sunflower's with her.


Here is Pam's, sorry it's a bit out of focus. She is going to put a picture of Chocolate an Owl that she has kindly adopted inside the secret recess which will be covered by the door.


Here is Marilyn's I did see it with all the pieces in place but not glued down, but she did promise that she would finish it when she got home. Again my photo skill's have not picked all the beautiful blue's and gold's.


Ruth has done a wonderful job with layering and texturing. She has painted all the embellishment's to blend them all together. No 4 is the magic number.


We had two Jill's which made it easy for Ruth to remember who she was sitting next too.
The main colour is Sage and highlighted with Spanish Topaz Treasure Gold, and there is a very special photo hidden behind the door.


Karen's inside pages are a lovely warm peach colour which she blended using Paper Artsy paints,
and copper tones. I think they really did work well together and I will take her example of standing back and looking before going to far.


Have you noticed I have just learnt I can add text to a photo..... First time I have used Picasa and I am just about getting the hang of it.


Here's Pam, Marilyn and at the far end Karen all working very hard.


Below are photo's that Ruth has kindly emailed to us showing her completed book and she has even finished the extra pages.


Thank you Ladies for a super day, anybody wanting to do the Beautiful Backgrounds workshop there are some places left for next Wednesday the 2nd of October.